

PaymentResult to your callback. It is SwiftUI under the hood, dependency-free,
and works from both UIKit and SwiftUI hosts.
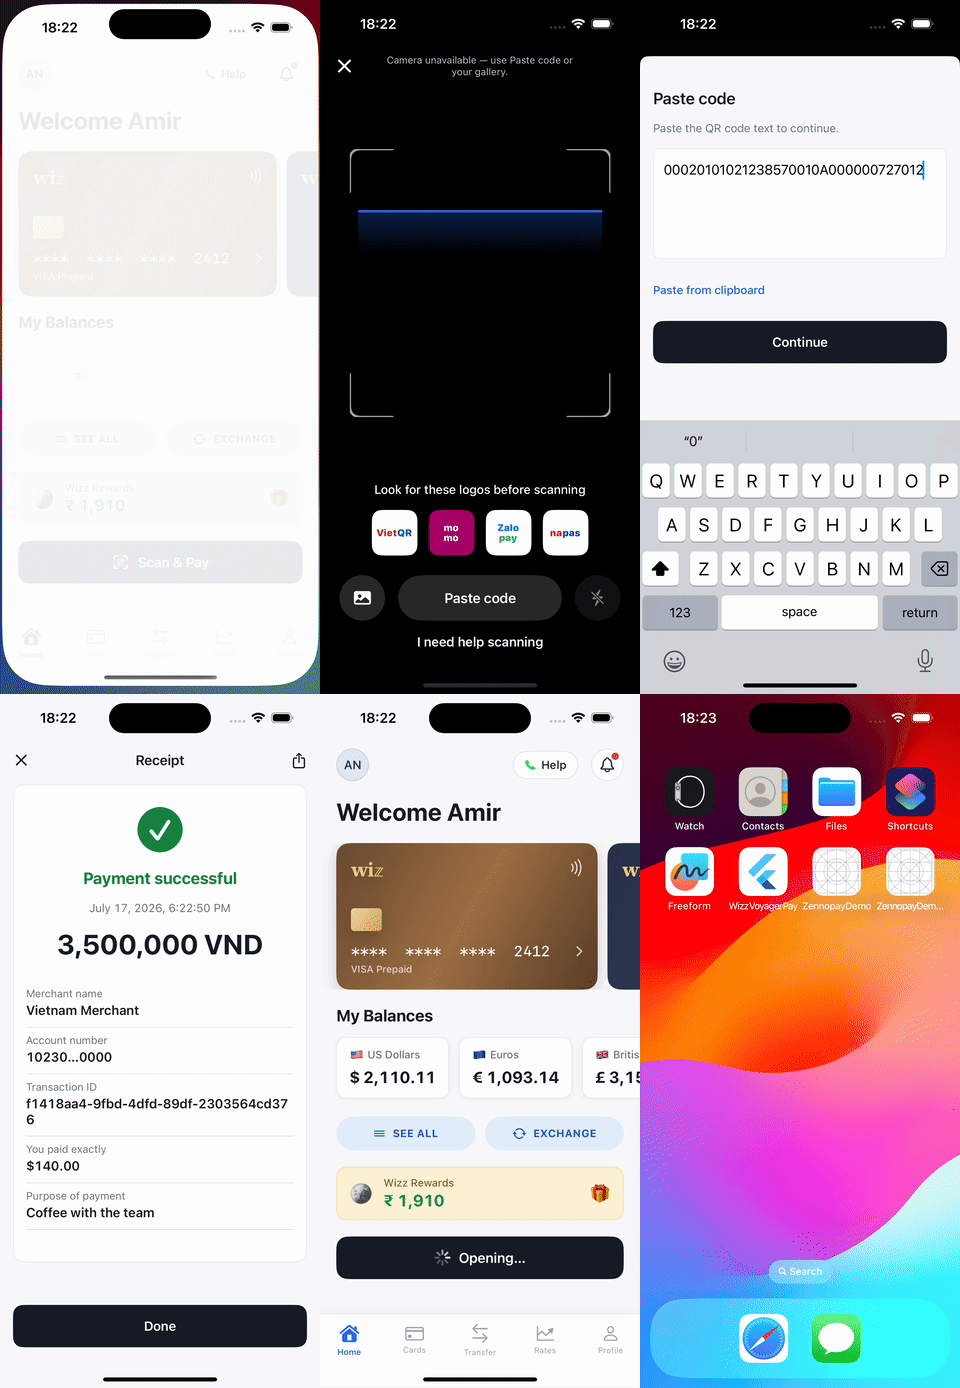
The PaymentSheet, end to end, presented from the sample wallet app.
Requirements
- iOS 16.0+ (the presented flow uses modern SwiftUI APIs)
- Swift 5.9+ / Xcode 15+
- No third-party dependencies
- A backend session endpoint that creates the intent and returns the Zennopay-minted session token
Install
In Xcode: File → Add Package Dependencies… and paste:Zennopay library product to
your app target. Or, in your own Package.swift:
Podfile and run pod install:
Declare camera usage
The sheet opens on a live camera scanner. iOS reads the permission prompt’s usage string from your app bundle, so add to yourInfo.plist:
If the user denies camera access (or the device has no camera), the sheet
automatically falls back to a paste-QR-data field — the flow is always
completable without a camera.
Configure
ZennopayConfig selects the environment. It is a value, never a code path —
one integration serves testing and production:
session_token value goes into the SDK’s sessionJWT argument.
Pass it unchanged; Zennopay mints the token for you.
Present the PaymentSheet
With a checkout session from your backend in hand, your app makes one call:.failed instead of an empty sheet.
Handle the result
ZennopayError is a typed taxonomy (invalidJWT, intentMismatch,
jwtExpired, sessionExpired, quoteExpired, paymentFailed, timedOut,
networkError, …). A .pending result means the user left during processing or polling timed
out. The payment may still settle. Show a soft state and reconcile via your
webhook or GET /v1/payment_intents/:id rather
than assuming a terminal failure.
Customize appearance
ZennopayAppearance themes the sheet to match your app — colors, corner radii,
font, primary button, and an optional logo in the sheet header. Pass nothing
and you get the default Zennopay look, following system light/dark.
Structural rules are not overridable: corner radii are clamped to ≤ 12 pt,
amounts always render in tabular figures, and the accent color is reserved
for state signals. The sheet can be branded, not restyled into a different
product.
Test
The Simulator has no camera. The sheet detects this and swaps the viewport for the paste-QR fallback automatically — paste any VietQR/EMVCo payload string and the flow proceeds identically (the backend does the authoritative parse either way). Two useful loops:- Sandbox end-to-end: run against
.sandboxwith a session from your sandbox backend and a real VietQR payload; delivery runs on the sandbox rail and the intent reachescaptured. - Fail-fast checks: pass an empty or mismatched session token and assert
you get an immediate
.failed(.invalidJWT)/.failed(.intentMismatch)with no UI.
Under the hood (what you can rely on)
- The session token lives in memory only and is sent as
Authorization: Beareron every call — it is never placed in a URL. - Slide-to-pay fires
POST /confirmexactly once; the idempotency key is persisted before the network call, so retries and process deaths can never double-debit. - On relaunch mid-payment, the SDK recovers the true terminal status with a
GETrather than re-confirming.
Next steps
Build your session endpoint
The one backend route the sheet needs.
Test your integration
The sandbox loops to run before release.
Webhooks
Reconcile terminal states server-side.
QR Payments limits
The corridor limits Zennopay enforces for you.